除了自车和他车(其他车辆),还有一些规则的物体比如圆柱体、椎体等这些可以通过 threejs 内置的几何体来实现,但其实智驾场景里还有很多不规则物体,如果比较简单,比如多边形柱体这类就可以借助自定义几何体来实现,复杂点的就建议建模了
BufferGeometry
BufferGeometry 是 threejs 内置几何体的基类,通过此基类可以自定义几何体。老玩家可能见过Geometry,它和 BufferGeometry的区别是啥?新版 threejs 其实已经不推荐使用Geometry,但为了向后兼容也仍然保留该类,其实底层会自动将其转换为BufferGeometry,后者提供了更好的性能和更高效的内存使用
它主要有以下几个属性,可以通过 attributes访问:
position顶点位置normal法线,也就是法向量,和光照有关color顶点颜色uv坐标,可以从贴图上提取像素映射到网格模型的几何体表面上index顶点索引。这个可以用来复用顶点数据,从而减少重复的顶点数据
在顶点 4 的地方,其实这里可以就算一个顶点索引,其实position、normal、color 和 uv 是基于顶点相对应的,接着看段伪代码理解一下:
// 顶点位置
const positions = [
    x1, y1, z1,  // 顶点1
    x2, y2, z2,  // 顶点2
    x3, y3, z3   // 顶点3
];
// 顶点颜色
const colors = [
    r1, g1, b1,  // 顶点1的颜色
    r2, g2, b2,  // 顶点2的颜色
    r3, g3, b3   // 顶点3的颜色
];
// UV坐标
const uvs = [
    u1, v1,      // 顶点1的UV
    u2, v2,      // 顶点2的UV
    u3, v3       // 顶点3的UV
];
// 索引,指定如何形成三角形,这里使用顶点0, 1, 2来形成一个三角形
const indices = [0, 1, 2];
// 将以上属性组合到BufferGeometry中
const geometry = new THREE.BufferGeometry();
geometry.setAttribute('position', new THREE.Float32BufferAttribute(positions, 3));
geometry.setAttribute('color', new THREE.Float32BufferAttribute(colors, 3));
geometry.setAttribute('uv', new THREE.Float32BufferAttribute(uvs, 2));
geometry.setIndex(new THREE.Uint16BufferAttribute(indices, 1));
// 接着将这个geometry与material结合,创建mesh并添加到场景中
长方体
其实 BoxGeometry 就是自定义几何体的实现,threejs 做了层封装方便我们使用,有余力的同学建议可以去读一读源码。那怎么用自定义几何体的方式实现一个长方体呢?
上面坐标数组的表示其实比较难读,这里可以借助 js 的扩展运算符来提高代码的可读性,主要是确立各个顶点的位置,法向量这里是垂直于所在面的正面向上,然后设置下几何体的属性,再加下材质和 Mesh,代码参考如下:
const vertices = [
  // 注意按逆时针方向排序
  // 正面, 因为没用到纹理,这里先不管uv坐标
  { position: [-1, -1, 1], normal: [0, 0, 1] },
  { position: [1, -1, 1], normal: [0, 0, 1] },
  { position: [-1, 1, 1], normal: [0, 0, 1] },
  { position: [-1, 1, 1], normal: [0, 0, 1] },
  { position: [1, -1, 1], normal: [0, 0, 1] },
  { position: [1, 1, 1], normal: [0, 0, 1] },
  // ...其他面类似处理
];
const positions = [];
const normals = [];
for (const vertex of vertices) {
  positions.push(...vertex.position);
  normals.push(...vertex.normal);
}
geometry.setAttribute(
  "position",
  new THREE.BufferAttribute(new Float32Array(positions), 3)
  // 等同于 new THREE.Float32BufferAttribute(positions, 3)
);
geometry.setAttribute(
  "normal",
  new THREE.BufferAttribute(new Float32Array(normals), 3)
);
const polygonMaterial = new THREE.MeshLambertMaterial({
  transparent: true,
  opacity: 0.2,
});
polygonMaterial.color.set(0, 1, 0);
const mesh = new THREE.Mesh(geometry, polygonMaterial);
this.scene.add(mesh);
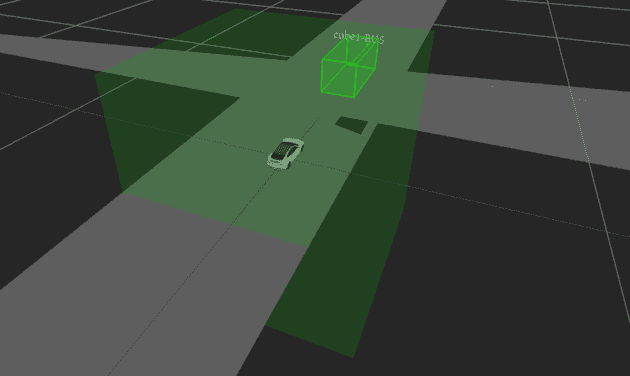
这样一套方法实现下来,效果如下:
自车包围的这一个立方体就是了,怎么有点像火影的尘遁?仔细看代码,其实会发现一个 BufferAttribute 对象,它能管理顶点着色器中的 Attribute 变量,通过此对象可以存储顶点位置信息、法线向量、顶点颜色等,并可以对其进行矩阵变换、拷贝、读写等
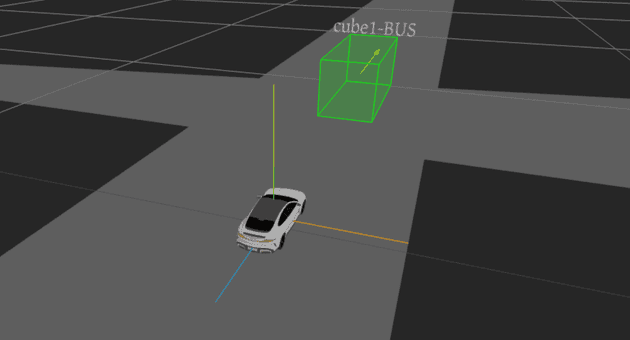
为了观察当前各个坐标轴方向,也可以引入 AxesHelper 协助观察坐标轴方向(如果你觉得右手定则麻烦的话),X 轴为红色,Y 轴为绿色,Z 轴为蓝色
const axes = new THREE.AxesHelper(1);
axes.position.y = 0.05;
this.scene.add(axes);
顶点索引
通过 setIndex 可以设置索引,这个索引可以用来复用顶点数据,从而减少顶点数量。用上述例子来看,其实一个面只需要四个顶点,另外俩个是可以复用的,以正面为例:
const vertices = [
  // 正面
  { position: [-1, -1, 1], normal: [0, 0, 1] }, // 顶点0
  { position: [1, -1, 1], normal: [0, 0, 1] }, // 顶点1
  { position: [-1, 1, 1], normal: [0, 0, 1] }, // 顶点2
  // { position: [-1, 1, 1], normal: [0, 0, 1] }, // 复用顶点2
  // { position: [1, -1, 1], normal: [0, 0, 1] }, // 复用顶点1
  { position: [1, 1, 1], normal: [0, 0, 1] }, // 顶点3
  // ...
];
geometry.setIndex([
  // 正面
  0, 1, 2, 2, 1, 3,
  // ...类似正面的方法设置下其他面
]);
const positions = [];
const normals = [];
// ...其他代码同上
使用后其实顶点 verticals 只需要设置 24 个顶点(每个面对应 4 个),如果不考虑法向量和 uv 坐标的话,甚至只需要 8 个。这么一套下来,麻烦吧 ~ 所以稍微复杂点的不规则物体,还是乖乖上建模吧
PolygonCylinder
这里的 PolygonCylinder 用来指代多边形柱体,也就是上下面是相等的多边形和指定高度组成的柱体,当然你如果想用 ExtrudeGeometry 来实现,也不是不行,就是搞复杂了,还会生成更多的顶点和面。下面还是想想办法怎么通过 BufferGeometry 实现一个多边形柱体,先定下图形接口:
export interface IPolygonCylinder {
  id: string;
  // 顶点,只需要底面几个顶点,顶面顶点通过高度可以计算出来
  contour: IPos[];
  // 高度
  height: number;
  color?: IColor;
}
类定义如下:
export class PolygonCylinder {
  // ...
  draw(data: IPolygonCylinder) {
    const { contour, height, color = { r: 0, g: 0, b: 0 } } = data;
    // 确保顶点顺序为逆时针
    if (THREE.ShapeUtils.isClockWise(contour)) {
      contour.reverse();
    }
    const vertices: number[][] = [];
    const normals: number[][] = [];
    const indexes: number[] = [];
    // 索引辅助下标
    let indexesIndex = 0;
    // 总共的顶点数量 = 顶面顶点+底面顶点
    // 确定顶面
    for (let i = 0; i < contour.length; i++) {
      const current = contour[i];
      vertices.push([current.x, current?.y + height, current.z]);
      normals.push([0, 1, 0]);
      // 设置顶面索引, 底面一般看不到, 所以可以不用设置索引
      // 三个点确定一个面, 注意按逆时针方向加入顶点索引
      if (i >= 2) {
        indexes[indexesIndex] = 0;
        indexes[indexesIndex + 1] = i - 1;
        indexes[indexesIndex + 2] = i;
        indexesIndex += 3;
      }
    }
    // 确定底面
    for (let i = 0; i < contour.length; i++) {
      const current = contour[i];
      vertices.push([current.x, current.y, current.z]);
      normals.push([-1, 0, -1]);
    }
    // 确定侧面, 这里复用下上下面的顶点就行
    for (let topIndex = 0; topIndex < contour.length; topIndex++) {
      const bottomIndex = topIndex + contour.length;
      // 终点处理, 这里的topIndex+1==底面起点, bottomIndex就是底部终点
      if (bottomIndex + 1 === 2 * contour.length) {
        indexes[indexesIndex] = topIndex;
        indexes[indexesIndex + 1] = bottomIndex;
        indexes[indexesIndex + 2] = topIndex + 1;
        indexes[indexesIndex + 3] = topIndex + 1;
        indexes[indexesIndex + 4] = 0;
        indexes[indexesIndex + 5] = topIndex;
      } else {
        // 一个面对应俩个三角形
        indexes[indexesIndex] = topIndex;
        indexes[indexesIndex + 1] = bottomIndex;
        indexes[indexesIndex + 2] = bottomIndex + 1;
        indexes[indexesIndex + 3] = bottomIndex + 1;
        indexes[indexesIndex + 4] = topIndex + 1;
        indexes[indexesIndex + 5] = topIndex;
      }
      indexesIndex += 6;
    }
    // 设置缓冲几何体属性
    const geometry = new THREE.BufferGeometry();
    geometry.setAttribute(
      "position",
      new THREE.Float32BufferAttribute(vertices.flat(), 3)
    );
    // 自动计算法向量, 柱体结构不够清晰
    // geometry.computeVertexNormals();
    geometry.setAttribute(
      "normal",
      new THREE.Float32BufferAttribute(normals.flat(), 3)
    );
    geometry.index = new THREE.Uint16BufferAttribute(indexes, 1);
    const polygonMaterial = new THREE.MeshLambertMaterial({
      transparent: true,
      opacity: 0.8,
    });
    polygonMaterial.color.setRGB(color.r, color.g, color.b);
    const polygonMesh = new THREE.Mesh(geometry, polygonMaterial);
    this.scene.add(polygonMesh);
  }
}
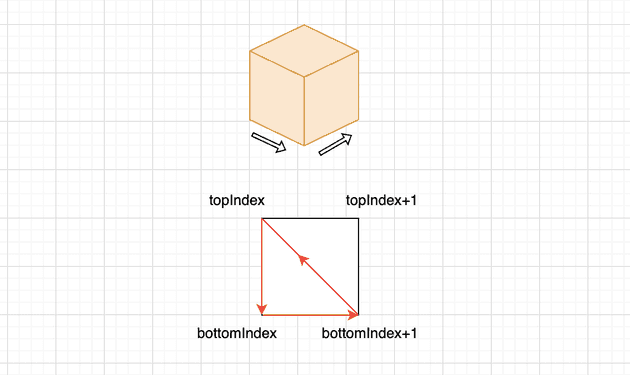
export default PolygonCylinder;isClockWise这个工具函数,可以用于判断一组点在二维平面上的投影方向是顺时针还是逆时针,有一些场景需要用到,比如填充多边形、计算几何体的方向等,如果是顺时针方向,需要对顶点做下逆序处理 reverse。如下图所示,对应红色三角形的索引为 topIndex > bottomIndex+1 > topIndex,顺序不重要,确保逆时针方向就行:
OpenGL 默认遵循右手法则,右手除拇指之外的四指根据点的逆时针握住,大拇指的方向即为法线方向,其逆时针的一面为正面,可以接受到光照;顺时针为反面,无法接受光照
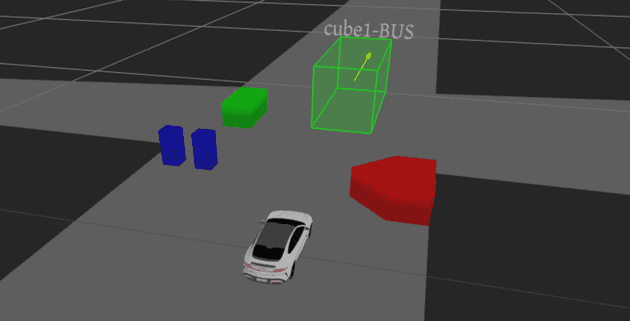
mock 些数据看看效果:
GL_INVALID_OPERATION: Vertex buffer is not big enough for the draw call
如果遇到这个报错,大概率顶点索引越界了,检查下索引和顶点是不是不匹配吧 ~


