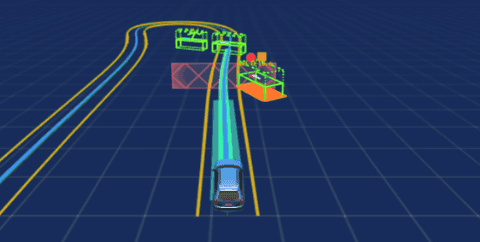
除了自车,那智驾里最常见的参与物就是他车了,比如下面这种绿色长方体(图片源于百度 apollo),然后上面可能会携带一些文字信息
实现长方体
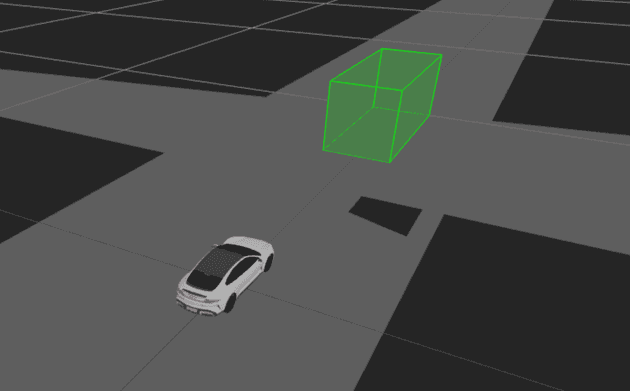
怎么做一个长方体?其实很简单,直接用内置几何体 BoxGeometry+EdgesGeometry 来实现,注意为了方便观察,这里要把 Mesh 做成透明的,绘制代码参考:
const material = new THREE.MeshBasicMaterial({
  color: 0x00ff00,
  // 注意这里要设置一下,否则opacity不会生效
  transparent: true,
  opacity: 0.2,
});
const geometry = new THREE.BoxGeometry(0.4, 0.4, 1);
const mesh = new THREE.Mesh(geometry, material);
mesh.position.set(0, 0.2, -2);
this.scene.add(mesh);
const edges = new THREE.EdgesGeometry(geometry);
const edgesMaterial = new THREE.LineBasicMaterial({ color: 0x00ff00 });
const line = new THREE.LineSegments(edges, edgesMaterial);
line.position.copy(mesh.position);
this.scene.add(line);
ok 有点模样了。接下来封装下这个 Cube 类,先定个基础的数据接口:
interface ICube {
  id: number;
  // 他车类别,比如BUS、TRUCK等
  type: string;
  // IPos和IColor定义可以参照上一篇文章或者github代码里找
  position: IPos;
  color: IColor;
  width: number;
  height: number;
  length: number;
}
Cube 类参考如下:
// src/renderer/cube.ts
class Cube {
  scene = new THREE.Scene();

  constructor(scene: THREE.Scene) {
    this.scene = scene;
  }

  draw(data: ICube) {
    const { position, color, width, height, length } = data;
    const material = new THREE.MeshBasicMaterial({
      transparent: true,
      opacity: 0.2,
    });
    // 如果一定要用setRGB设置颜色,建议直接让上游先除以255再给到前端,咱前端能不计算就不要计算
    material.color.setRGB(color.r, color.g, color.b);
    const geometry = new THREE.BoxGeometry(width, height, length);
    const mesh = new THREE.Mesh(geometry, material);
    mesh.position.set(position.x, position.y, position.z ?? 0);
    this.scene.add(mesh);
    const edges = new THREE.EdgesGeometry(geometry);
    const edgesMaterial = new THREE.LineBasicMaterial();
    edgesMaterial.color.setRGB(color.r, color.g, color.b);
    const line = new THREE.LineSegments(edges, edgesMaterial);
    line.position.copy(mesh.position);
    this.scene.add(line);
  }
}

export default Cube;
顶部文字
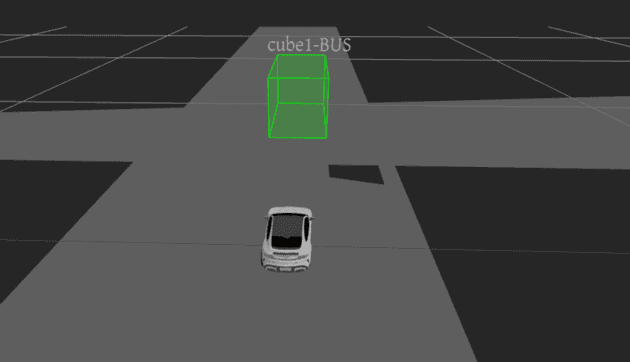
他车其实携带了 id 和 type,为了直观看到这些属性,可以将他们绘制到对应的参与物顶部或其他容易观察的位置,可以用 TextGeometry 和 FontLoader 实现 3d 文字。font 字体文件直接到 threejs 的 github 仓库 下载一个,我直接放 public 里了
老规矩,先定个基础接口:
export interface IText {
  id: string;
  // 字体大小
  size: number;
  color: IColor;
  position: IPos;
  content: string;
}
绘制函数参考如下:
// src/renderer/text.ts
import { FontLoader } from "three/examples/jsm/loaders/FontLoader.js";
import { TextGeometry } from "three/examples/jsm/geometries/TextGeometry.js";

let font: any = null;
const fontLoader = new FontLoader();
fontLoader.load("gentilis_regular.typeface.json", (res) => {
  font = res;
});

export function renderTextMesh(data: IText) {
  const { content, color = { r: 1, g: 1, b: 1 }, position, size = 0.1 } = data;
  const textGeo = new TextGeometry(content, {
    font,
    size,
    depth: 0.01,
  });
  textGeo.computeBoundingBox();
  const material = new THREE.MeshPhongMaterial();
  material.color.setRGB(color.r, color.g, color.b);
  const centerOffset =
    -position.x * (textGeo.boundingBox!.max.x - textGeo.boundingBox!.min.x);
  const textMesh = new THREE.Mesh(textGeo, material);
  textMesh.position.set(centerOffset, position.y, position.z || 0);
  textMesh.rotation.x = 0;
  textMesh.rotation.y = Math.PI * 2;
  return textMesh;
}
注意这里字体文件是异步加载的,在创建文字的时候需要先确保字体文件已经加载成功
然后怎么关联他车?注意 renderTextMesh 函数的返回值,在新建他车的时候,顺带新建一个 textMesh,并且在他车实例对象里保留这个 text 的引用,确保后续移除他车时能一并移除。在 cube 实例对象里追加下面的逻辑,具体位置看实际情况而定
// src/renderer/cube.ts
// ...
 draw() {
   // ...
   this.scene.add(line);
   // 绘制顶部文字
    const text = id + "-" + type;
    const textMesh = renderTextMesh({
      id: text,
      content: text,
      position: {
        x: mesh.position.x + width,
        y: mesh.position.y + height / 2 + 0.1,
        z: mesh.position.z,
      },
    });
    this.scene.add(textMesh);
  }
文字缓存
这里针对 textMesh 可以做个缓存,因为大部分情况下他车在好几帧里面是重复的,对应的顶部文字也是相对固定的,毕竟 3d 文字渲染相对比较耗时,可以借助缓存直接复用对应的 Mesh 对象。因为 id+type 是唯一标识,可以作为缓存对象的 key,参考代码如下:
type TextCache = Record<string, THREE.Mesh>;
class Cube {
  textCache: TextCache = {};
  // ...
  draw() {
    // ...
    if (this.textCache[text]) {
      const textMesh = this.textCache[text];
      mesh.textMesh = textMesh;
      group.add(textMesh);
    } else {
      // ...
    }
  }
}
朝向箭头
这里可以用官方的三角箭头,但如果对各个视角的观察要求不是很高的话,其实这里只需要二维箭头,可以用 Shape来实现,在大量他车的场景下对渲染还是有一点点提升的。这里先做成固定长度的就行了,主要是提供一个方向的参数,也作为一个接口直接让上游控制箭头的绘制
// src/renderer/arrow.ts
export interface IArrow {
  id: string;
  // 箭头尾部坐标,可以确定方向和长度
  endPoint: IPos;
  origin: IPos;
  length?: number;
  // 颜色哈希值
  hex?: string;
}

class Arrow {
  scene = new THREE.Scene();

  constructor(scene: THREE.Scene) {
    this.scene = scene;
  }

  draw(data: IArrow) {
    const arrowHelper = drawArrow(data);
    this.scene.add(arrowHelper);
  }
}

export default Arrow;

export function drawArrow(data: IArrow) {
  const { origin, endPoint, hex = 0xffff00 } = data;
  // 通过箭头起点和终点计算方向向量
  const dir = new THREE.Vector3(
    endPoint.x - origin.x,
    endPoint.y - origin.y,
    (endPoint.z ?? 0) - (origin.z ?? 0)
  );
  // 获取箭头长度
  const length = dir.length();
  const dirData = new THREE.Vector3(dir.x, dir.y, dir.z);
  dirData.normalize();
  const originPos = new THREE.Vector3(origin.x, origin.y, origin.z ?? 0);
  const arrowHelper = new THREE.ArrowHelper(dirData, originPos, length, hex);
  return arrowHelper;
}
其实可以把他车、文字和朝向箭头做成一个 Group,好处是减少 drawcall 和便于一起操作,比如移动、旋转和缩放等。Cube对象修改代码参考如下:
// src/renderer/cube.ts
  draw(){
    // ...
    // 绘制顶部文字
    const text = id + "-" + type;
    const textMesh = renderTextMesh({
      id: text,
      content: text,
      position: {
        x: mesh.position.x + width,
        y: mesh.position.y + height / 2 + 0.1,
        z: mesh.position.z,
      },
    });
    // 挂载到他车Mesh上
    mesh.textMesh = textMesh;
    group.add(textMesh);
    // 绘制朝向箭头
    const arrowMesh = drawArrow({
      id: data.id + "-" + "arrow",
      endPoint: {
        // 注意:这里只是模拟数据,实际endPoint应该根据算法结果来确定
        // 或者给个偏转角,前端做个计算,固定长度也行
        x: mesh.position.x,
        y: mesh.position.y,
        z: mesh.position.z - length,
      },
      origin: {
        x: mesh.position.x,
        y: mesh.position.y,
        z: mesh.position.z,
      },
    });
    mesh.arrowMesh = arrowMesh;
    group.add(arrowMesh);
    this.scene.add(group);
  }
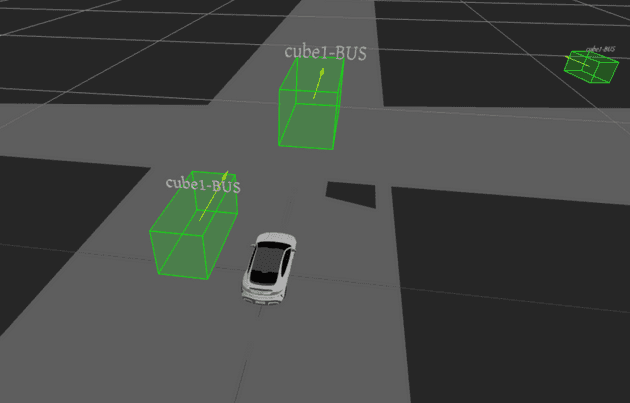
mock 些数据来看看,效果如下:
最后
如果还要追求更好的场景效果,也可以用参与物模型替代立方体。但其实参与物也不全是这种规则的立方体,还需要实现一些柱体、不规则立方体等以满足实际场景需求,而且有时候 3d 文字并不能提供足够的信息,这时候就需要考虑 2d 小卡片了


